This is an archived blog post from 2014
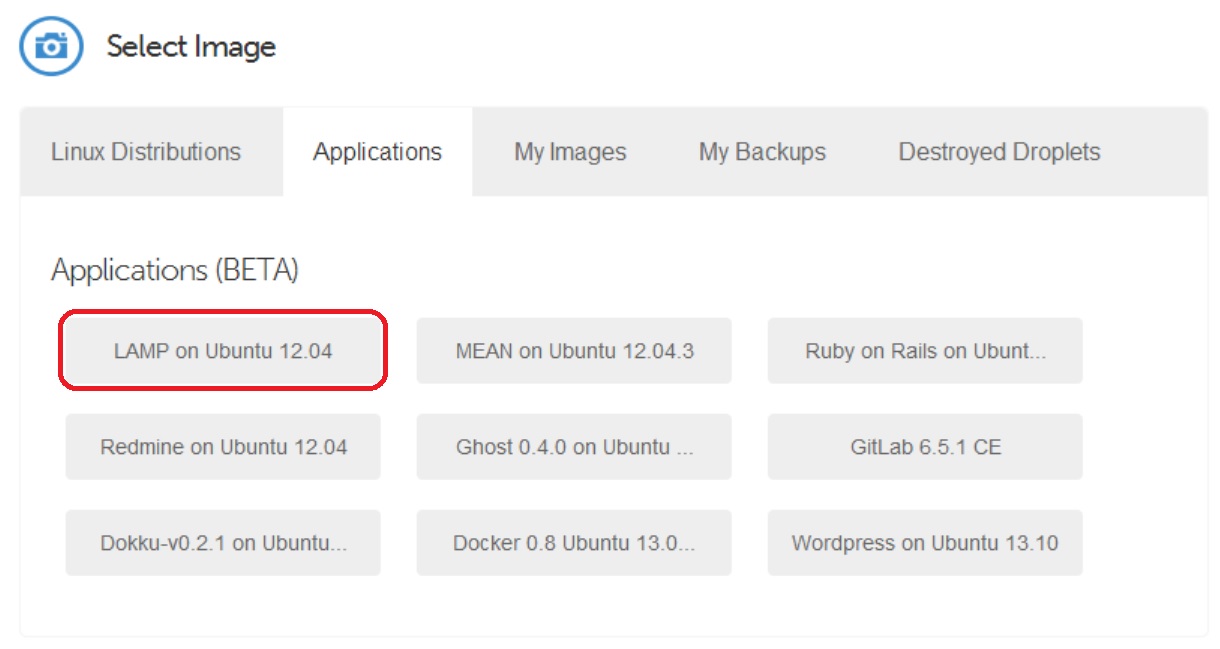
Laravel is a comprehensive and opinionated PHP framework that's great for getting projects up and running quickly. I'm a huge fan of the VPS services offered by DigitalOcean and it's incredibly easy to use. The combination of Laravel and DigitalOcean has become my goto solution for web apps and as such I've learned some valuable lessons in getting things setup and configured correctly. Before we jump in I want to point out that this is intended to be a guide to quick and easy deployment for development purposes. So don't use this verbatim for production or you're asking for trouble. There are some important security steps excluded from this guide for the sake of brevity. I'm assuming that you already have a DigitalOcean account so the first step will be to create a new droplet (server instance). You can choose whatever options you like for this step except for one. We'll be utilizing the pre-configured LAMP stack image to create our droplet. It can be found under the Application tab under the Image section.
Once that is finished you'll receive an email with the login details for your sever. Next we'll be getting our hands dirty and using SSH to access the terminal of our server. Using your SSH client of choice (OSX has SSH installed in the terminal; Windows requires it to be installed: I use PuTTY) connect to your server and we'll get started with the configuration.
The very first thing you'll want to do is make sure everything is updated:
sudo apt-get update
sudo apt-get dist-upgrade
Keep in mind while updating things that we're using a system image that has been pre-configured and customized so if there are any conflicts between an update and a local modification, err on the side of caution and keep the original local version.
Once that's been done we need to enable the Apache mod_rewrite module:
sudo a2enmod rewrite
Next we'll install PHPMyAdmin and also secure it. We'll start by updating the default MySQL root user password which is 'password'. Bear in mind that this is the root (IE full access) account for your database so it needs a secure password. In the following command you'll replace 'newpassword' with your new password:
mysqladmin -u root -p'password' password newpassword
When running the PHPMyAdmin installer you'll be given a couple of prompts. Follow these steps in order:
- Select Apache2
- Choose YES when asked about whether to Configure the database for phpmyadmin with dbconfig-common
- Enter new root MySQL password
- Enter the password you want for the phpmyadmin MySQL user
Install PHPMyAdmin
sudo apt-get install phpmyadmin
Once you've finished installing PHPMyAdmin we need to add it to Apache's config:
sudo nano /etc/apache2/apache2.conf
Add this to the bottom of the file:
Include /etc/phpmyadmin/apache.conf
Once that's finished restart Apache and we can move on:
sudo service apache2 restart
Now that PHPMyAdmin is installed, administering your database will be a cinch. You can access PHPMyAdmin by visiting http://example.com/phpmyadmin where example.com is your server url or ip. Then login using your root MySQL account. At this point you might want to go ahead and create a database for your Laravel project to use.
Next we'll focus more on Laravel specific setup. The first thing we'll need is Composer, which Laravel uses for dependency management. To install Composer you'll need to run these commands:
curl -sS https://getcomposer.org/installer | php
sudo mv composer.phar /usr/local/bin/composer
We're finally ready to get Laravel onto our server. Our site document root is /var/www by default. If you already have a Laravel project you can either copy the files to the document root using SFTP (I like Filezilla for this) or if you're using Git (if not you should be) you can install it very easily:
sudo apt-get install git
Then you can clone your repo into the document root. If you're staring from scratch we can create a new Laravel project using Composer.
composer create-project laravel/laravel your-project-name --prefer-dist
"your-project-name" is the name of the folder Composer is going to create for your project. If you're using Git or Composer you'll then need to run
composer install
to download and install all of the dependencies that Laravel and your project need. If you used SFTP you can skip this step by ensuring you copy over the 'vendors' folder. Only a few more steps and we're finished.
Once Laravel is copied to the server we need to make sure that all of the permissions are set correctly. Navigate to your project folder and run the following commands:
sudo chown -R www-data: app/storage
sudo chmod -R 755 app/storage
Before we move on now would be a good time to update Laravel's database config file which is located in "project-folder/app/config/database.php". Use the MySQL and database information that we've created and used up until this point. In addition to this, it's a good idea to go through all of the Laravel config files to ensure everything is setup how you want it.
The final step is to point our server to the Laravel public folder. We need to edit our Apache config:
nano /etc/apache2/sites-enabled/000-default
There are two lines in this config file that need to updated. Originally they'll say:
DocumentRoot /var/www
<Directory /var/www>
Change them to reflect the public folder in your project folder:
DocumentRoot /var/www/project/public
<Directory /var/www/project/public>
Then add the following two lines inside of that same "Directory" tag:
RewriteEngine On
RewriteBase /var/www/project/public
Once that's finished and saved we need to restart Apache:
sudo service apache2 restart
And that's all there is to it! Granted there is a lot of seeminlgy disparate information but when you really look at it, there isn't much going on. We installed a couple of programs to make development easier, set up Laravel, and set up Apache. In addition to that, doing these sorts of things really helps you to learn more about Linux and how to work solely through the terminal. DigitalOcean provides tons of great resources to help you get started with your server. Most of the things I've learned about server administration have come from DigitalOcean articles, Stack Overflow, and AskUbuntu.
comments powered by Disqus